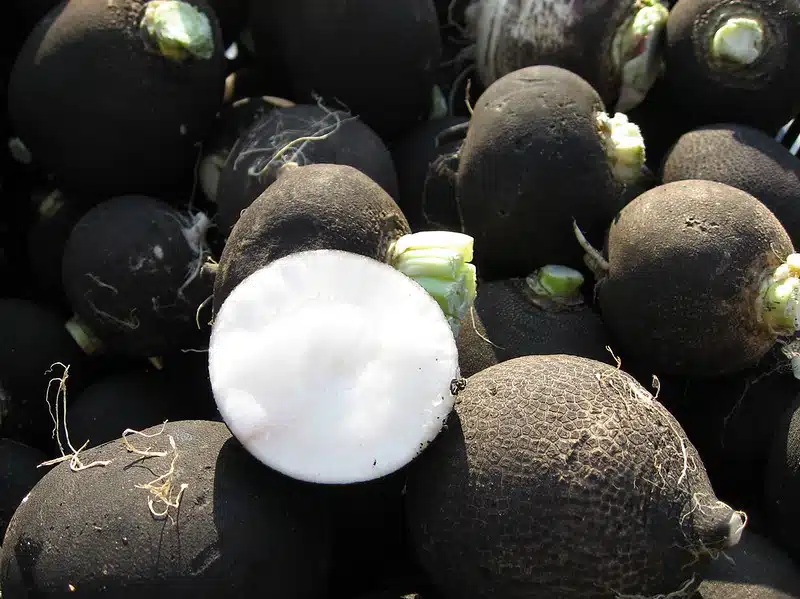
Black radishes are an excellent alternative to traditional “red” varieties and are particularly good for growing over the cooler months. Though they’ve fallen out of vogue somewhat, black radishes were common in Western Europe during the 1800s, where they were appreciated for their punchy taste.
There are a few varieties, of which “Spanish Round” is the most popular. Compared to the more common types, black radishes tend to be slightly longer-growing (usually between two and three months) and, as mentioned, hotter in taste. They’re most commonly eaten raw in salads or boiled to lighten the taste. Despite the greater amount of time that they require in the ground, however, they’re perfect for planting later in the year, up to September and October, because they’re very cold-hardy.
For container gardeners, black radishes are superb vegetables because they’re unfussy, don’t develop extensive root systems, and have no requirement for high quantities of nutrients.
If you’re planning to sow seeds in late summer or autumn, all you need to do is add a little balanced fertilizer to your used potting mix, transplant young plants sown indoors (or straight into pots), and leave them alone for a few months. For optimum harvests, keep the following advice in mind…
Factsheet
- Botanical name – Raphanus sativus.
- Time to harvest – 60 – 90 days.
- Sowing months – Spring: February to March; Summer/Autumn: July – October.
- Harvest months – Spring: May – June; Summer/Autumn: October – January.
How to Grow Black Radishes: Tips and Advice
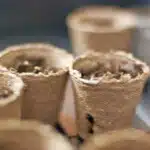
The important thing to remember is that black radishes are cool season crops. This means that they are best planted in early spring or late summer/early autumn. If you are planning on growing through spring, sow the seeds indoors to ensure germination, transplanting when the young plants are strong enough (peat pots for sowing are always a sure bet for root veggies).
Though there are several varieties of black radish, only two are relatively well-known and available:
- Black spanish round – These are the most common type. They’re round in shape and grow to about the size of a beetroot.
- Black spanish long – The “spanish long” variety is cylindrical in shape and will grow, depending on how long you leave it in the ground, up to ten inches. It has a sharper taste than its globe-shaped counterpart.
It’s also worth mentioning the variety Nero Tondo, which can be planted later in spring for growing through summer due to its resistance to bolting.
Black radishes are relatively trouble-free as far as growing is concerned. Keep them well-watered if you’re sowing or transplanting in August as temperatures can still be quite high. Thin netting will also protect against most pests, particularly slugs. There’s no need to provide protection over winter.
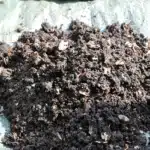
Replenishing Old Potting Soil…
If you’re not using fresh potting mix in your containers, then you’ll need to replenish it with some nutrients. Any one of the following is a good option:
Chicken manure pellets – Use chicken manure pellets if you’re planting in early spring, as they will release nutrients as the weather warms. NPK is around 4%-2%-1%.
- Vermicompost (worm castings) – Good quality worm castings will provide a balance of NPK, along with a host of micronutrients and beneficial soil bacteria.
- Fish, blood and bone fertilizer – Fish, blood and bone is one of the most popular balanced fertilizers and will rejuvenate potting mix when it’s added. It’s slow-release, lasting over three months.
- Generic slow release fertilizer – My back-up when I can’t go “natural” is synthetic balanced fertiliser, usually in the form of granules. They’re easy to add to pots but make sure you find a product that has micronutrients too. If not, supplement with a liquid seaweed feed on a weekly/bi-monthly basis.
- Liquid feed – The other alternative, of course, is to apply a regular liquid feed (the advice is usually to feed at weekly intervals). As with any generic slow-release fertilizer, make sure you go for one with micronutrients added, as doing so will prevent any nutritional imbalances from arising.
Storage
The traditional way to store root vegetables is to submerge them in moist sand and keep them in a cool place. The easier option is to pop them in a paper bag (which will help with moisture control) and leave them in the fridge, where they will keep for several months.
Pests and Problems
Though radishes of all varieties are relatively trouble free, particularly when they’re grown in colder weather when pest activity is generally low, there are a few usual culprits to watch out for…
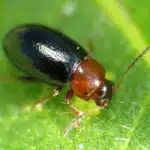
Flea beetles – Flea beetles feed on the leaves of all brassicas. Small holes in the leaves are the tell-tale sign. They tend to go for younger plants so transplanting from indoors is a good way to avoid them.
- Slugs – Slugs can still be active even when it’s cold so keep an eye out for them.
- Cutworms – Cutworms, which are the larvae of moths, are awful little blighters. Protect the base of the stem by surrounding it with a plastic plant pot with the bottom cut out.
- Aphids – Aphids can also be a problem for radishes so keep an eye out for them. They’re very easy to spot on the undersides of leaves.
What are your thoughts?
Have you successfully grown black radishes? Leave your thoughts and advice in the comments section below!
Image Credits
Black Radishes by Shihmei Barger, Flea Beetle by Katja Schulz, Peat Pots by MyNeChimKi, Worm Castings by Sacramento HR
Wow thanks for the ideas. Very detailed. Me and my mom love gardening!
Thanks Andrea!
I thought Black radishes could only be grown in the outside garden. But I didn’t think of container. Thanks for the great idea! I’ll surely try it.
Hi Matthew! Thanks! Happy gardening.