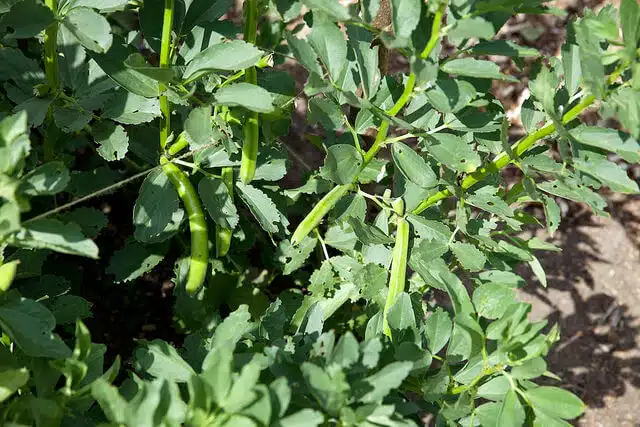
Broad beans seem unlikely candidates for containers. The problem is that they can get big. With most varieties, you’re looking at height of more than a metre. That’s enough to send container growers running to take shelter under the nearest pot!
But the diverse range of dwarf varieties (that will reach one to two feet) overcome this problem, giving you all the benefits of broad beans without the drawbacks. They’re easy plants to grow – happy in colder weather, high-yielding, and largely unbothered by pests.
At around 14 weeks growing time, they’re also quick movers, making them ideal for staggered sowings. Sow in March and you’ll be eating home-grown, homemade bean casserole in June…or a salad, if you’re that way inclined (preferably with your own leaves).
Factsheet
| Germination/sprouting time: | 1 – 2 weeks. |
| Time from sowing to harvest: | 3 months. |
| Size of pot: | Large. |
| Difficulty of growing in pots? | Easy. |
Sowing and harvesting calendar
Sow: February to mid May
Harvest: June to October
A little side note: the curious history of broad beans
Broad beans are one of the oldest cultivated vegetables and probably the first “bean”. They date back at least 8000 years, when they were first grown in the Mediterranean.
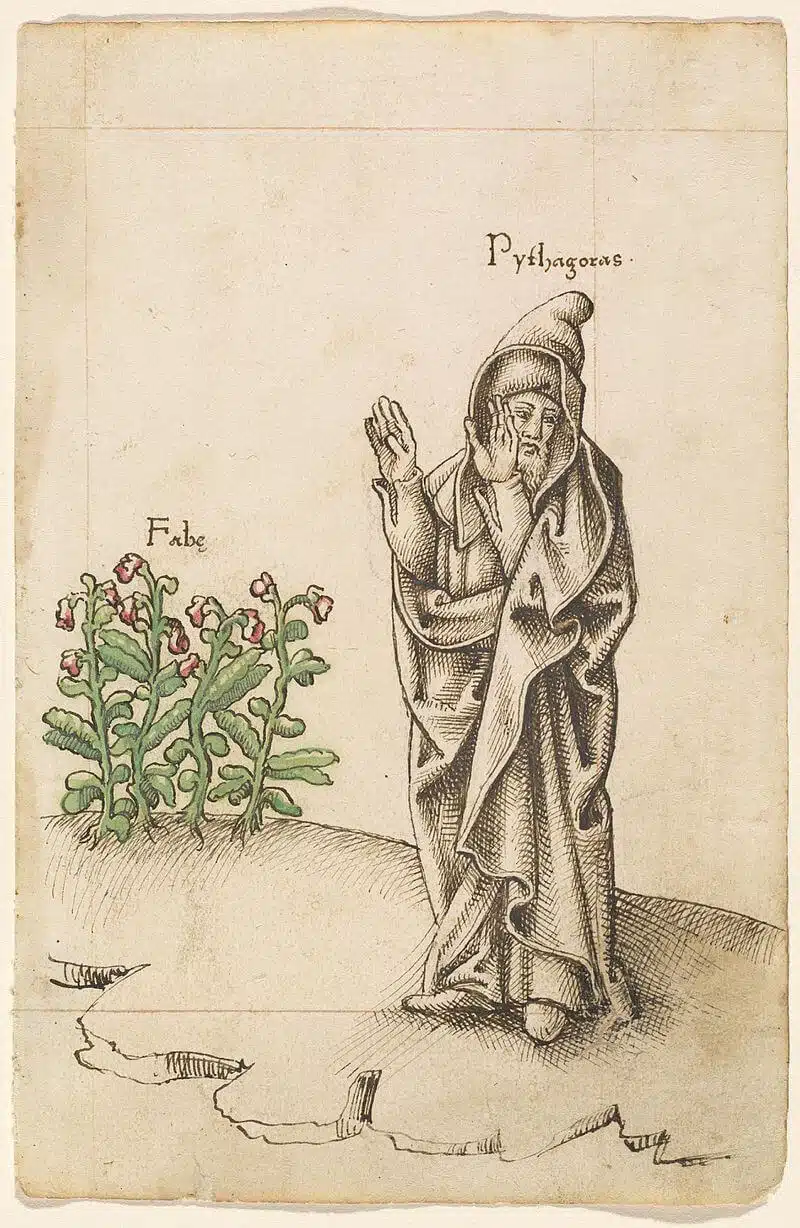
Followers of the sect of Pythagoras (Pythagoreans) weren’t allowed to eat them and often described the plants in pretty disparaging terms. The risk of favism, a rare but potentially fatal condition caused by exposure to broad beans, was perhaps the cause of this view.
Potting soil tips
- A good potting mix for broad beans is well-fertilized and free-draining. Add a little extra drainage material (grit, perlite or composted bark) and a few extra handfuls of slow-release fertilizer. Alternatively, liquid-feed every week once the seedling has put on some growth. Your drainage material should make up no less than a third of your total mix.
- All of the above in mind, broad beans are unfussy. They’re good candidates for already-used potting soil, especially if you’re planting in autumn. Just make sure you rejuvenate it with some fertilizer.
- Broad beans don’t like soil that’s saturated with water, so good drainage is a must, especially in the wetter months.
Sowing and planting
- Sow seeds about 2 in. (5cm) deep, with several to a pot (depending on size) but don’t overcrowd them. Allow at least 6 inches of space between plants.
- There are three times of the year to sow broad beans: early autumn (usually October or November), late winter (February) and up until the end of spring (March to May). The last period (March to May) is the most common time for sowing. You’re less likely to encounter problems with frost in this period, though the’re an increased risk of black bean aphid (see below).

- Early autumn (October and November) – Go for a variety that has some resistance to the cold, which will be needed for overwintering. City microclimates and small, well-sheltered spots are ideal for sowing at this time of year. Once again: make sure the variety is suitable.
- Late Winter (February) – Start seedlings indoors and be ready to provide protection.
- Spring (March to May) – The main sowing season. Stagger sowings (every month or so) for a good supply. Pods freeze well after they’ve been harvested so you don’t need to worry about having too many.
Growing tips
- If sowing in autumn, provide as much protection as possible. Bubble wrap your pots and have some fleece to hand in the case of frost over winter. The main issue with planting at the end of the year is loss of plants to frost. Keep an eye on the weather forecast and if it’s going to be a very cold night wrap the plants up. I’m not a fan of keeping fleece on plants for long periods (it creates a moist environment ideal for pests like slugs) so take it off when the weather warms.
- After six weeks or so, feed weekly with a balanced liquid feed if you haven’t added slow-release fertilizer when putting together your potting mix. The exception to this is through winter, when autumn-planted broad beans will be dormant.
- The main thing to remember is that the plants need lots of water when the pods start to develop. At this stage. and especially in dry weather, water liberally.
- If you’re going for a dwarf variety, staking shouldn’t be necessary. For run-of-the-mill varieties, pop some bamboo canes next to the young plants so that you can stake them (use twine not plastic ties) as they grow.
- With dwarf varieties, you don’t need to worry about pinching off. Otherwise, when the first bean pods appear, tear off the top couple of inches (above a leaf node/branch) with your fingers. This will ensure that all energy goes into the formation of pods. It will also deter black bean aphids, which love the scrumptious young shoots. These are completely edible (and tasty) so don’t throw them away!
Harvesting
- When are broad beans ready to harvest? It really depends on whether you want to shell them or cook the pods whole. The general advice is that pods above 2 in. long are OK for harvesting.
- After you’ve harvested, the plants are excellent fodder for the compost bin.
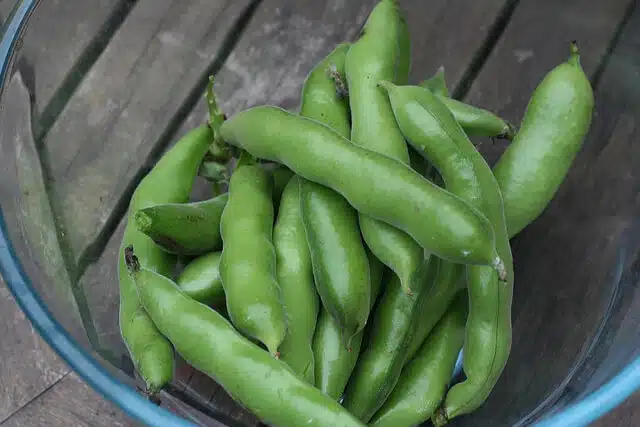
- For shelling, pick when you can see the bulbous outline of the beans through the skin of the pod (see the picture). Do this before the seams/scars of the beans turn brown, which indicates that they’re tough. They should still be green or white.
Pests and problems
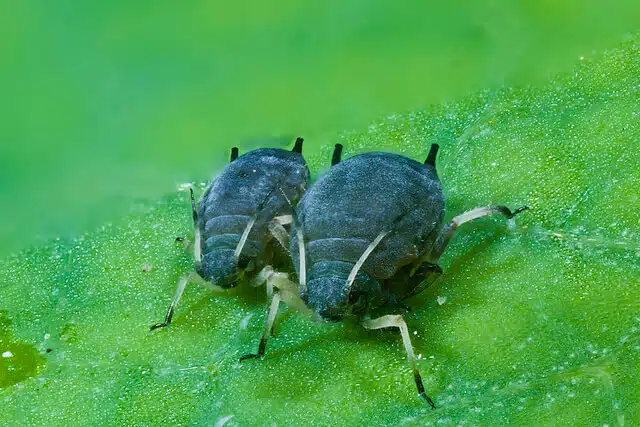
- Black bean aphid – Black bean aphid is the main potential problem. They’re difficult to miss because big groups of the little buggers colonize leaves and stems. Pinching out the tops once pods start to form is an important preventative measure. If you are unlucky enough to be bothered by them, scrape them off and use a homemade insecticide until they go away.
- Chocolate spot – If leaves appear blotchy with brown spots, your plants may have a bout of chocolate spot. Unless it’s chronic, it will likely just be an issue of appearance and the beans will still be edible. Give plants lots of space and air if the spots do appear.
- Other common issues, like downy mildew, can occur. Use a homemade pesticide.
- Always discard seeds with little black holes in them. These are caused by tiny grubs and won’t germinate (or produce weak plants).
Good broad bean varieties for pots
Good varieties for US growers include:
- Stereo Bush – I’m not entirely sure where the name comes from, but this compact, bushy variety is good for pots. The slimmer pods can be eaten raw, cooked when young, or left to ripen. Expect it to grow to around three feet in height.
- Broad Windsor – This variety is worth mentioning simply because it’s so widespread. It might be the most available broad/fava bean variety in the US. It grows higher than dwarf varieties but isn’t too tall, making it possible to grow in containers. It will reach between three and four feet in height.
Good varieties for UK growers include:
- The Sutton – Probably one of the best-known compact varieties in the UK. If you’re wondering whether or not it’s got anything to do with the seed company Suttons…well, it’s bred by them. It is fast-growing, suitable for sowing all year round (including November) and will only grow to a height of 1.5 feet.
- Robin Hood – Another variety bred specifically for containers and small spaces. You might want to try both The Sutton and Robin Hood (which is supposed to have good pest-resistance) and see which one you prefer.
Broad beans: storage and cooking
- Broad beans are adaptable. When young they can be eaten raw. More mature pods can either be cooked whole or shelled (see the harvesting advice above). Personally, I prefer to eat them steamed when they’re younger.
- They can also be frozen or dried. In my opinion, drying is too involved. The beans are usually left on the plant (or hung in a room) to dry out before storing. They need soaking and a longer cooking time, however, when you do eventually come to eat them. Freezing is a much better option. Pick the fresh beans (see harvesting advice above), shell and then blanch them for a few minutes, before bagging and freezing. They’ll keep for at least a year.
- If the individual beans have brown or black scars because they’ve been harvested too late or left to dry, then remove the skins (after cooking and before serving).
More Resources
- The New Vegetable & Herb Expert by dr. D.G. Hessayon – I recommend this book in most of my guides. There’s an excellent section covering all the different types of beans (the classifications can certainly be confusing).
- Grow Your Own Crops in Pots by Kay Maguire – Another great container growing book that also has a section on broad beans.
- Vegetables for the Gourmet Gardener (RHS) by Simon Akeroyd – A superb little book that combines cultivation advice with little snippets of history and trivia. Not a container gardening book but well worth a place on your bookshelf.
More container vegetable growing guides
If there’s some more space in your container garden, consider having a look at some of our other guides:
- Grow Carrots in Containers
- Grow Garlic in Containers
- Grow Kale in Containers
- Grow Black Radishes in Containers
- Grow Spinach in Containers
What are your thoughts? Leave a comment below!
Have you tried growing broad beans in containers? Leave a comment below and let me know how it went!
Image credits: Broad Beans by Malcolm Manners, Fava Plant by Ariel Mieling, Homegrown Broad Beans by Deirdre, Broad beans by Malcolm Manners, Black Bean Aphid by Sascha Kohlmann.
I found this a great and informative read. Thank you.
Thanks Jeremy!
Very helpful report. Thank You.
Thanks Michelle!
Sow 5″ deep?
Hi Steele. Well spotted! Got my inches and centimeters mixed up there. 2 in/5cm is what I should have put.