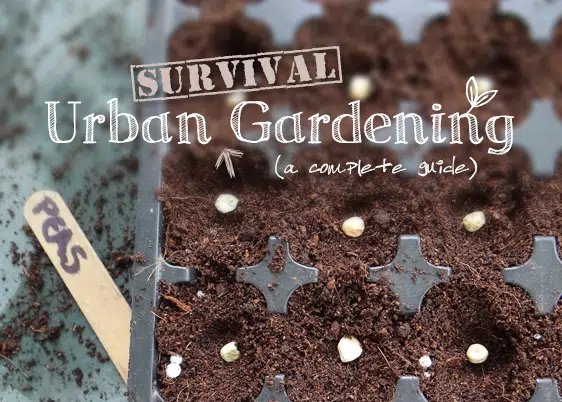
Note: this guide is aimed at those who intend to garden in containers, rather than directly in soil. If you have a small plot click here.
What happens when the potting mix runs out of nutrients?
What about pests, especially when insecticides aren’t available?
What about winter and early spring, when even the hardiest veg refuses to grow?
These are a few of the questions that I want to tackle. I’m not a survivalist, but I am a gardener with an interest in the topic. And I’ve found that most information about urban survival gardening falls short, especially online.
So in this guide I want to outline how you can have a high-yielding edible garden, in even the smallest of city spaces, that covers all the bases. I hope you enjoy it…
The Basics of Survival Container Growing

I believe that the essence of growing food in difficult circumstances can be distilled into a handful of key guidelines.
Each of the longer sections below corresponds to one of the following principles. If you’re in a hurry, this is the meat of the article.
- Use storable media to make your own potting mixes. Materials like coir and perlite will keep indefinitely and don’t take up a great deal of space.
- Know your feeds. Concentrated products store well and will enable growing when compost isn’t available.
- Be as self-sufficient as possible, given your circumstances. Wormeries, bokashi bins and hot composters are all ways in which city-dwellers can recycle the majority of their waste in a small space.
- Choose the right veg varieties. Opting for those that are small, nutrient-rich and fast-growing can dramatically boost your harvests. Using the right containers will help too.
- Companion plant to deter pests. Growing the right combinations of plants together can be as effective a deterrent (if not more so) than insecticides and fungicides, though it doesn’t hurt to have some around.
- Extend the growing season. With the right approach, and hopefully a city micro-climate, you can grow all year round.
So lets dig a little deeper into each of these…
1. Getting the Potting Mix Right

Most of the guidance out there (at least the stuff that I’ve come across) runs something like this: get yourself some potting soil, plant a few seeds in pots, then sit back and wait.
Now in normal circumstances this isn’t entirely bad advice. Plants are more forgiving than we think. Often a good “multi-purpose” is all that’s needed.

But there’s an issue. After about six weeks, unless there’s some kind of slow-release fertilizer added, all of the nutrients will have been used. This in itself can be remedied by appropriate feeding. But at the end of the growing season the compost and peat (which is usually the base ingredient) in your mix will have degraded – reducing its air-holding capacity, and so its utility.
Plus, say that disaster does strike. Will your top priority really be to go out and buy a year’s worth of compost?
Breaking Down Container Composts and Mixes
The solution is to craft your own mix with easily-stored and homemade materials. And once you’ve got the knack of the process, it’s pretty easy to do.
The first step is understanding that a growing medium has three functions. It provides the plant with: (1) water, (2) air, and (3) nutrients (dissolved in the water).

Most commercial mixes (at least in the UK) are made up of a mixture of peat, which is great at holding water, and compost (pure rotted-down food and garden waste), which provides nutrients. They’ll often have some kind of artificial fertilizer added too.
So this is what we want to replicate. We need materials that, when combined, hold water, air and nutrients. Whilst there’s an array of formulations, everything from composted bark to rice hull-based mixes, I prefer the following recipe:
- 1 part coir. The reason for using coir, which has ideal water-holding properties, is twofold. First off, it’s sold as a 6oo gramm compressed brick and so stores very well. When hydrated it gives about nine litres of mix. Secondly, it has a near perfect pH for veg growing. This means it doesn’t need to be treated (limed) in the same way as peat.
-

Perlite also stores very well. 1 part perlite. Perlite is a type of volcanic glass that’s been heated to a very high temperature, which causes it to take on a popcorn-like consistency. When used for container growing, it aids significantly with drainage and air porosity. A single bag is inexpensive and will last indefinitely.
- 1 part compost or manure. The beauty of this mix is that, even if there’s no compost available (we’ll get onto making it in small spaces in a moment), you can rely on feeds (covered next) exclusively, using just coir and perlite.
This, of course, isn’t the only formula. But it does work very well. Once you’ve got an understanding of the basics, it’s always worth experimenting with your own recipes if you have the inclination. There’s further resources that cover potting mix ingredients at the end of this article.
So, once you’ve got your growing medium sorted out, it’s time to think about feeds…
2. Know Your Feeds

Every container gardener uses fertilizer of some sort. They’re necessary because a single pot is unable to hold all of the nutrients a plant needs throughout its lifetime. It’s always worth considering, when discussing feeds and fertilizers, how a plant grows hydroponically. I also run a sister site (The Hydroponics Grower) so it’s a topic that I’m interested in as much as this one.

In a basic soilless system, a plant is suspended in a nutrient solution. An air pump (like those used for fish tanks) provides the roots with oxygen. Every so often the solution is topped up with feed.
The plants in such a system are perfectly healthy.
This is relevant to us for a few reasons. First, we’ll have to supplement our container plants with liquid feed at some point, usually after a period of six weeks, when our growing medium is exhausted. Secondly, if nutrient-rich compost or manure isn’t available, we can rely entirely on our stored inert media and nutrients.

The advice for storing liquid feeds and fertilizers is simple. Opt for hydroponic mixes as they’re usually of a higher comparative quality and contain all the micro-nutrients that plants need. Concentrated solutions are better as they’ll last for much longer.
The following is a brief introduction to plant nutrition…
A Very Short Introduction to Plant Nutrition for Survival Gardening
Three nutrients are required by plants: nitrogen, phosphorous and potassium (usually in the form of water-soluble potash salt). These three are referred to as NPK, and that’s the symbology you’ll find on the back of most feeds.
In a nutshell, nitrogen is responsible for greenery, phosphorus for roots, and potassium for fruit and flowers. This is why many gardeners tailor their mixes through the growing cycle, often adding more potassium in the fruiting stage.
In addition to these basic nutrients, plants also require fourteen other trace elements (called micronutrients).
Fertilizers are available in various forms. Liquid feeds have been alluded to, but controlled release and slow release fertilizers are also available. These both release nutrients into the soil over a long period of time (often up to twelve months). They’re best-suited to mixes that contain organic matter as they act more as a “top-up”, rather than an exclusive source of nutrition.
When to Feed?
There’s nothing overly complicated about fertilizing container plants. If you’ve crafted a mix with fresh compost, then start to feed, weekly, after a period of six weeks. Simply follow the instructions on the packet. Alternatively, you can add some controlled-release fertilizer in the preparation stage and not worry about liquid feeds at all.
If you’re relying entirely on inert media (say just coir and perlite), you will need to feed more frequently with a slightly dilute mix. Advice varies, but you’ll probably need to water every one or two days, adding dilute feed each time. Each watering will flush the mix of accumulated salts so there won’t be a buildup of nutrients. Get yourself a big watering can to save time.
3. Self-Sufficiency With Compost

It’s worth distinguishing between hot and cold composting. A hot pile, which will be tailored to comprise an optimal balance of nitrogen and carbon-containing materials, will reach temperatures of up to 160 degrees Fahrenheit (70C). Because certain beneficial bacteria are attracted to hot conditions, this drastically speeds up the composting process.

In order to achieve said temperatures, the pile needs to be of a certain size. This “critical mass” threshold is around 3ft by 3ft (about a metre in height, depth and width). Unfortunately for small-space growers, this usually isn’t attainable. So unless we can artificially increase the temperature of our pile, by using something like a hotbin, we have to rely on cold composting.
Cold composting is perfectly viable, it just takes longer. If you’re parsimonious, filling the gap with feeds, there needn’t be an issue.
Quick-Start Guide to Small-Space Composting
Find as big a container as possible and drill some holes into it, which are vital for aeration. Next, add some kind of drain to the bottom so that run-off fluid doesn’t build up. An good way of achieving this is to place one container into another – that way you can collect the liquid and use it as a compost “tea”.
You want to make sure your bin contains a 1:1 mix (by volume) of carbon-high and nitrogen high waste. Add any (or a mix of) the following carbon-containing materials:
- Shredded newspaper, paper and cardboard.
- Dead leaves.
- Straw
Nitrogen-containing materials to add:
- Vegetable peelings.
- Apple cores.
- Coffee grounds and tea bags/leaves.
- Eggshells
- Stale bread.
- Grass.
- Weeds.
You’ll want to avoid all animal products (with the exception of eggshells) as these take much longer to rot down and attract the wrong kind of predators.
To help the decomposition process along, paint the container black (which will mean greater heat absorption) or add some insulating material, as with the hotbin mentioned above. Bubble wrap is an easy and effective option.
Wormeries
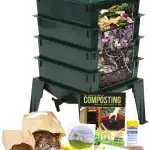
Wormeries are a godsend for small-space gardeners. They allow you to recycle large amounts of kitchen waste in a very small time. Though incredibly nutrient-rich, worm castings (worm faeces, also called vermicompost) don’t contain the requisite NPK levels to replace compost in potting mixes, so they’re best used as an amendment. My friend Henry runs a superb site on the topic.
Bokashi
Bokashi is a Japanese method of fermenting food prior to composting it – the benefit being that it decomposes faster. Mark Ridsdill Smith has written an excellent post for container growers about it.
4. Choose the Right Veg Varieties

Once you’ve got your potting mix, your feeds, and your compost organized then the next step is to think about varieties. My advice here is to avoid long-growing root vegetables and fruits for the most part.
Alongside the fact that they tend do better in pots, smaller veggies can be planted more closely and the yield from lots of little plants is usually greater than a handful of large ones. Equally, you’ll be able to grow (and harvest) more of them over the same period.
If you consider, for example, that “Tom Thumb” lettuce only takes eight weeks to grow, you can easily get in four harvests between March and October.
Here’s a little guide to small varieties of common vegetables…
Small Veg Varieties
Beans (Runner): Hestia, Pickwick
Beetroot: Zeppo, Detroit 2 Little Ball.
Carrots: Parisienne, Little Finger, Parmex.
Kale: Dwarf Blue Curled.
Lettuce: Tom Tumb, Lollo Rosso, Marvel of Four Seasons, Salad Bowl.
Radishes: French Breakfast, Cherry Belle.
Tomatoes: Gardener’s Delight, Sungold, F1 Totem.
Opt for Long-Lasting Seeds
Certain seeds last longer than others and it’s worth keeping this in mind when buying. Stored in a dry, cool place (preferably in an airtight container), they’ll be sure to achieve their maximum life expectancy.
There’s no hard and fast rules but generally speaking beet, carrot, marrow and radish seeds can last for up to six years. Lettuce and tomato usually last around three.
5. Companion Plant Intelligently

You want to intersperse your veg with a good variety of different pest-discouraging plants, covering all the bases.
Whilst there are dozens of possible combinations (you can see a full table here), I prefer to keep things simple. There are four plants that have between them a host of great qualities (for us, at least…not the pests) and are compatible with nearly everything. Place them strategically around your container space.
Mint: Best suited to containers because of its invasiveness and great at deterring aphids.
Marigolds: Pop these next to your tomatoes to deter whitefly. Marigolds are actually edible and make a nice “flower tea”.
Garlic: There’s lots of insects that dislike the smell of garlic. Sow a few bulbs in individual pots and scatter them around your patio or balcony.
Basil: Aphids, beetles, mosquitos, mites…the list goes on. A warm-weather plant so best started indoors and taken out during summer.
6. Extend the Growing Season

We want to take advantage of every inch of container space! Because space is at a premium, it’s important that it’s used scrupulously for as long as possible.
There are five things that I recommend doing to extend the growing season, here they are…
1.Grow Winter Lettuces
Lettuces are a great crop to grow through the winter months. With the exception of the coldest periods, you can make successional sowings of lettuces all through the year. Certain varieties, like Arctic King and Marvel of Four Seasons do extraordinarily well in freezing temperatures. Though they will go somewhat dormant through December, January and February, they can still be harvested.
2. Use Cloches
Cloches for pots are one of the easiest ways to boost your harvest. Pop them over, for instance, autumn-sown lettuces and radishes to help them grow a little longer into the colder weather. If you don’t fancy building them, you can simply use plastic cake covers (drill some holes to limit condensation).
3. Get a Mini Greenhouse
These are great for two reasons. First you can grow hot-weather plants, like tomatoes and cucumbers, in them through summer. Secondly, they allow a space for smaller plants, like lettuces, through autumn and winter. – alongside under homemade cloches on your pots of course!
4. Grow Indoors
It’s beyond the scope of this article to go into any level of depth, but grow lights, hydroponic systems and low-light veg are all ways of utilizing indoor space for food.
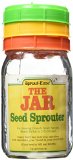
5. In the Coldest Months, Grow Sprouts and Microgreens
For home-grown nutrition through the coldest months, consider sprouting seeds and growing microgreens. Both are momentously healthy and very easy to look after. Seeds only take three days to sprout in jars.
References and Further Reading
A Container Gardening Intro from Patrick Blair
A Guide to Container Gardening from Consumers Base
Image Credits: Maggie, Unsplash, Scott Butler, Maja Dumat, Justin Snow, Maggie McCain